Oct 26, 2020

API Testing 'A Beginners View': JavaScript - Array.prototype.length

"length" is a property of arrays in JavaScript. It returns the number of values in an array. 

The value returned by this property is always an integer. We can define the length property to an array at any time. When we extend an array by changing its length property, the number of actual values increases; for example, if we set length to 4 when it is currently 3, the array now contains 4 values, which causes the third value to be a non-iterable empty holder.


Example:

Response Body:

[ { "type": "configuration/entityTypes/HCP", "tags": [ "FCQA", "Jency Test Data", "Integration Testing" ], "attributes": { "Country": { "value": "Brazil" }, "TypeCode": { "value": "Nurse" }, "FirstName": { "value": "Kilian" }, "LastName": { "value": "Lethley" }, "Prefix": { "value": "MR." }, "Gender": { "value": "Male" }, "StatusIMS": { "value": "Active" }, "PresumedDead": { "value": "false" }, "InternationalHCP": { "value": "FALSE" }, "ClinicalTrials": { "value": "false" }, "PrivacyPreferences": [ { "value": { "OptOut": { "value": "false" }, "AllowedToContact": { "value": "false" }, "PhoneOptOut": { "value": "false" }, "EmailOptOut": { "value": "false" }, "FaxOptOut": { "value": "false" }, "VisitOptOut": { "value": "false" }, "TextMessageOptOut": { "value": "false" }, "MailOptOut": { "value": "false" }, "RemoteOptOut": { "value": "false" }, "OptOutOneKey": { "value": "false" }, "KeyOpinionLeader": { "value": "false" }, "ResidentIndicator": { "value": "false" } } } ], "Specialities": [ { "value": { "SpecialtyType": { "value": "Primary" }, "Specialty": { "value": "ANESTHESIOLOGY" }, "Rank": { "value": 1 }, "PrimarySpecialtyFlag": { "value": "true" } } } ], "ValidationStatus": { "value": "Valid" }, "IsBlackListed": { "value": "false" }, "RequiresAttention": { "value": "false" }, "TriggerDCR": { "value": "false" }, "Address": [ { "value": { "PrimaryAffiliation": { "value": "TRUE" }, "AddressType": { "value": "Shipping" }, "Country": { "value": "Brazil" }, "AddressLine1": { "value": "100 Main Street" }, "City": { "value": "Rio de Janeiro" }, "StateProvince": { "value": "RJ" }, "Zip": [ { "value": { "Zip5": { "value": 10000 } } } ], "VerificationStatus": { "value": "Partially Verified" }, "ValidationStatus": { "value": "Valid" }, "Status": { "value": "Active" }, "AVC": { "value": "P22-I44-P2-100" } } } ] } } ]


Test Script:

var resp = JSON.parse(responseBody);
console.log(resp);
for (var i = 0;i<resp[0].tags.length;i++
{
    console.log("Length of vaultID's array is: " + resp[0].tags.length);
    console.log("Index Value during iteration is: " + i);
}

Console Output:

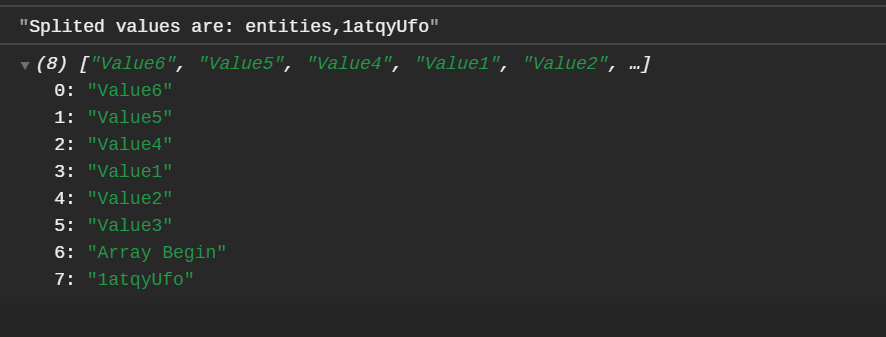
In the above example, based on my JSON response, I have used the length property on array "tags", it's clear from the console output that the length of the array is 3 and in each iteration, the index value is printed correctly as in the screenshot.


Happy Learning 😇


Oct 19, 2020

API Testing 'A Beginners View': JavaScript unshift() Method

The unshift() method adds one or more values at the start of an array. If multiple values are passed in parameters, then all values are inserted at once at the beginning of the array, by the same order the parameters were passed.


Syntax

arr.unshift(value1[, ...[, valueN]])


Parameters

valueN: The values that need to be added in front of the array.


Example:

Response Body:


Test Script:

var resp = JSON.parse(responseBody);

//API Testing 'A Beginners View': JavaScript unshift() Method
accept_encoding = [];
var split = "gzip, deflate, br";
var split_value = split.split(",");
console.log("accept-encoding is: " + split_value);
accept_encoding.push(`${split_value[0]}`);
console.log(accept_encoding);
accept_encoding.push(`${split_value[1]}`);
console.log(accept_encoding);
accept_encoding.push(`${split_value[2]}`);
console.log(accept_encoding);
accept_encoding.unshift("Array First Element");
console.log(accept_encoding);
accept_encoding.unshift("Array Second Element");
console.log(accept_encoding);
accept_encoding.unshift("Array Third Element");
console.log(accept_encoding);
pm.environment.set("Unshift_Values", (accept_encoding));


Console Output:


In the above example, I used the previous post split() method (https://softwaretestingcafebyjency.blogspot.com/2020/10/JavaScript-split-Method.html) and continued to add the unshift() method to append more values at the start of the array. The accept_encoding.unshift()method is used to add values at the start of the array ‘accept_encoding’.


Important Notes:

Invoking unshift with n values all at once, or invoking it n different times with 1 value at a time will not yield the same results.


Let me explain with examples.

Snippet 1:

entityArr = [];
    var split = "entities/1atqyUfo";
    var split_value = split.split("/");
    console.log("Splited values are: " + split_value);
    entityArr.push(`${split_value[1]}`);
    console.log(entityArr);

Console Output '1' will look as below:

Splited values are: entities,1atqyUfo

(1) ["1atqyUfo"]

Based on the above snippet, here the push() method will push the value of index 1 from the splitted string to array entityArr and output would be as ["1atqyUfo"] as seen in the output section.


To this, if I add the unshift() method as below:

Snippet 2:

entityArr = [];
    var split = "entities/1atqyUfo";
    var split_value = split.split("/");
    console.log("Splited values are: " + split_value);
    entityArr.push(`${split_value[1]}`);
    entityArr.unshift("Array Begin");
    console.log(entityArr);

Console Output now will be as below:

Splited values are: entities,1atqyUfo

(2) ["Array Begin", "1atqyUfo"]

Here the unshift() method will add the string ‘Array Begin’ to the start of the array as seen in the output section.


Again if I add multiple values all at once to the same array using unshift() method as below, look how my console output will change:

Snippet 3:

entityArr = [];
    var split = "entities/1atqyUfo";
    var split_value = split.split("/");
    console.log("Splited values are: " + split_value);
    entityArr.push(`${split_value[1]}`);
    entityArr.unshift("Array Begin");
    entityArr.unshift("Value1","Value2","Value3");
    console.log(entityArr);

Console Output now will be as below:

Splited values are: entities,1atqyUfo

(5) ["Value1", "Value2", "Value3", "Array Begin", "1atqyUfo"]

Here the multiple values are added to the start of the array as we passed with unshift() method.


Now comes a twist, let’s pass few more values one by one again to the same array as below:

Snippet 4:

entityArr = [];
    var split = "entities/1atqyUfo";
    var split_value = split.split("/");
    console.log("Splited values are: " + split_value);
    entityArr.push(`${split_value[1]}`);
    entityArr.unshift("Array Begin");
    entityArr.unshift("Value1","Value2","Value3");
    entityArr.unshift("Value4");
     entityArr.unshift("Value5");
      entityArr.unshift("Value6");
    console.log(entityArr);

Console Output now will be as below:

Value is inserted first come first shift basis.

Hope this clarified the unshift() method more clearly.


Happy Learning 😇


Oct 17, 2020

API Testing 'A Beginners View': JavaScript shift() Method

The shift() method removes the first element from an array and returns that removed value. The shift method removes the element at the zeroeth index and shifts the values at consecutive indexes down, then returns the removed value. If the length property is zero, it returns the output as 'undefined'.


Syntax:

arr.shift()


Return value:

The removed element from the array. If the array is empty value returned is undefined.


Explanation with Example:

Response Body:


Test Script:

var resp = JSON.parse(responseBody);

//API Testing 'A Beginners View': JavaScript shift() Method
accept_encoding = [];
var split = "gzip, deflate, br";
var split_value = split.split(",");
console.log("accept-encoding is: " + split_value);
var shift_value = split_value.shift();
console.log(shift_value);
var shift_value = split_value.shift();
console.log(shift_value);
var shift_value = split_value.shift();
console.log(shift_value);
var shift_value = split_value.shift();
console.log(shift_value);
var shift_value = split_value.shift();
console.log(shift_value);

Console Output:


In the above example, I have used the previous post on 'split' method (https://softwaretestingcafebyjency.blogspot.com/2020/10/JavaScript-split-Method.html) and continued to add the shift() method to return the first element with the same example. 


The split_value.shift() method is used to return the first element from the string defined.


Oct 15, 2020

API Testing 'A Beginners View': JavaScript pop() Method

The pop() method removes the last element from an array and returns the removed value.

If you call pop() to an empty array, it will return output as 'undefined'.

Syntax
arrName.pop()

Return value
The removed element from the array and it would be 'undefined' if the array is empty.

Explanation with Example:
Response Body:


Test Script:
var resp = JSON.parse(responseBody);

//API Testing 'A Beginners View': JavaScript pop() Method
accept_encoding = [];
var split = "gzip, deflate, br";
var split_value = split.split(",");
console.log("accept-encoding is: " + split_value);
var pop_value = split_value.pop();
console.log(pop_value);
var pop_value = split_value.pop();
console.log(pop_value);
var pop_value = split_value.pop();
console.log(pop_value);
var pop_value = split_value.pop();
console.log(pop_value);
var pop_value = split_value.pop();
console.log(pop_value);
Console Output:


In the above example, I have used the split() method from a previous post on the split() method (https://softwaretestingcafebyjency.blogspot.com/2020/10/JavaScript-split-Method.html) and continued to add the pop() method to return the last element for the same example.

The split_value.pop() method is used to return the last element from the string defined.


Oct 14, 2020

API Testing 'A Beginners View': "Mockaroo" - A Cool Test Data Generator Tool

Recently, while working on a project I came across a need to generate data in bulk for testing purposes. So, it was then my team lead suggested the usage of the ‘Mockaroo tool’, which proved to be a hassle-free way to generate test data as and when required using REST API callouts. 

In this post, you find details on:
  • How to create simple bulk mockup test data?
  • How to get the mockup data in postman to use as per your need?
Prior to the start:
You should create an account in ‘Mockaroo’. (https://mockaroo.com/users/sign_in)
 
Here we go for the steps:
  1. Using the link shown above, register on ‘Mockaroo’. Once done, an API key will get generated for your account. This key will be used in all the API calls made to mockaroo. To know the API key, go to the Account page after logging in to Mockaroo.

  2. Once a ‘mockaroo’ account has been set up, create a schema for the entity under the ‘Schemas’ tab. Mockaroo has its own set of data types which is needed while creating fields for the schema. (We can import schema details such as the name of fields and data types using CSV headers or JSON to prevent human error) NOTE: For field names in the schema, we must use the same name as that of the API field name.
  3. On the launch of new schema creation, you will see some auto-populated fields provided by mockaroo as a sample, follow the same manner and start entering your fields as per need using the Mockaroo available datatypes. On the launch ‘Schema Creation Page’ look is as below:

  4. Available Data Types:

  5. Once the necessary fields are set up as per the API , save the schema.
  6. After save of schema mockaroo will generate a ‘curl url’, which will be the endpoint that needs to be used in your collection the postman as needed.

  7. Copy the url and use the GET method to call the test data generator url in your postman collection. 

  8. In order to use the test data fetched, set a variable either globally or environment to hold the test data, as below;

  9. Call the variable in the next POST request ‘Body’ for the endpoint you want the test data to be used and hit the send your data would be created in the requested endpoint;

Few known important things about MOCKAROO:
  • 3 subscriptions of mockaroo are available:
    • Free (200 API calls/day)
    • Silver (no limit to number of API Calls, 1 million records/day)
    • Gold (no limit to number of API calls, 10 million records/day)
  • Data Types used in mockaroo schemas are intrinsic to mockaroo and any other data type cannot be used.

Oct 12, 2020

API Testing 'A Beginners View': Dynamic Variable Usage

Postman uses the pseudo library to generate dummy data. You can generate random names, addresses, email addresses, and much more. You can use these pre-defined variables multiple times to return different values per request. Also, you can use these variables like any other variable defined in Postman. Their values are generated at the time of execution and their names start with a $ symbol e.g. $randomPhoneNumber, $randomCity, $randomDateFuture, etc.

To use dynamic variables in pre-request or test scripts, you need to use:
  • pm.variables.replaceIn()
  • e.g. pm.variables.replaceIn('{{$randomFirstName}}').
Recently in my daily routine work, got to use this feature, so here is how I made use of the dynamic variables 😇

My Requirement: Fetch $randomeFirstName and set the real value of $randomFirstName at the environmental level so I can access it in the test script.

Solution: 

1. In Pre-Request Script: 
    • Define a function to return the randomly generated value
    • Set an environment variable to hold the randomly generated value that returns from the function defined.
    • Snippet: 
    pm.environment.set("RandomFirstName"getRandomFirstName());
    function getRandomFirstName() {
        const RandomFirstName = pm.variables.replaceIn("{{$randomFirstName}}");
        return RandomFirstName;
    }
2. In Body: Call the variable defined at that environment level
{
"FirstName": [{
            "value": "{{RandomFirstName}}"
        }]
}

3. Example: